PixiEditor 2.1.0.0-dev is here - Brush Engine, smart layers, blackboard, new renderer and more
THIS IS A UNSTABLE, DEVELOPMENT RELEASE - USE AT YOUR OWN RISK
After months of work, I can finally show you exciting changes and new features. As stated above, this is a development release, which means it may be buggy, there are lacking features and there is a risk, that files made in dev versions will not work as expected in next stable releases.
To test it out, follow How to use Development Channel | PixiEditor Docs
Brush Engine
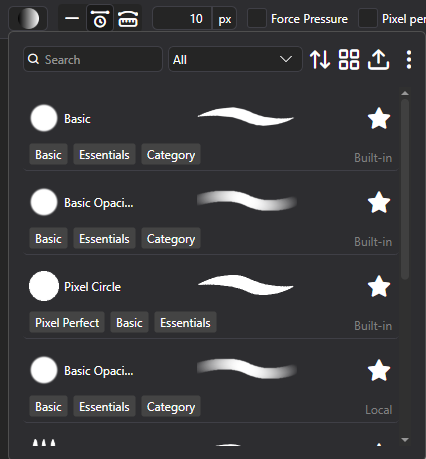
Likely, the most awaited of features, you can now create your own Brushes with PixiEditor’s Node Graph!
At the moment, there are 6 built-in brushes, that you can test and use as a template for creating your own Brushes.
Use new Brush Picker within Pen Tool to select, duplicate and edit brushes.
Remember, brushes behave differently within Pixel Art and Painting toolset!
Small how-to guide, before I write proper docs
- Create Brush Output Node to define a new Brush
- Each Brush Output Node requies a Shape and either a Fill, Stroke or Content
- Adding Brush Node automatically adds a Brush to Brush Picker, but only as long as you have the document open. To add a Brush permanently, you need to save the file and use import button (upload icon) inside Brush Picker
- Duplicating a Brush in Brush Picker will duplicate the Brush, you can edit duplicated Brushes by right-clicking on it and using “Edit” option
- Check out how other Brushes are made, this is the best way to learn
Brush Output Inputs explanations
- Shape: The shape of the brush, can be set to any vector.
- Stroke: Outline Paintable of the shape (gradient, color, texture)
- Fill: Fill paintable of the shape (gradient, color, texture)
- Content: It’s similar to Fill, but it allows to connect any arbitrary render input. So for example, if you want to use a custom shader as a Brush, you can use Stroke Info’s “Target Sample Texture” input, plug it into the shader, modify the pixel data there and output of the shader to Content input.
- Transform: Transformation for “Content” Input, like offset, rotation or scale
- Blend Mode: How paint stroke should be blended with target image (It’s after you release the mouse)
- Stamp Blend Mode: How each individual “drop” of brush should blend with other “drops”. In other words, how brush should blend new stamp with previous stamps within one brush stroke (so after each pointer movement, but while it is pressed)
- Use Custom Stamp Blender: If any of built-in stamps is not enough, Custom Stamp Blender input will appear and you’ll be able to use SKSL to write a custom stamp blending function
- Custom Stamp Blender: Appears if Use Custom Stamp Blender is checked, see above.
- Can Reuse Stamps: It is a optimization input. If your brush stamp looks the same for each position, stamp will be calculated once and reapplied across movement. It only affects brushes, that use Content input. Use whenever possible for performance gains.
- Pressure: By default, Brushes do not react to Pen’s pressure. You can connect Pointer’s Info Pressure value to add pen support or use custom pressure logic. Pressure affects the size of the Brush.
- Spacing: By default, Brush is applied as often as possible when you move your pointer, spacing defines a minimal distance, that must be traveled before next stamp is applied. Values are from 0-100 and are percentage of stamp size.
- Fit to stroke size: Should brush automatically fit to tool size.
- Auto position: Should brush automatically position itself under the pointer position. Disable to manually calculate brush stamp positions.
- Always clear: Should each stamp clear previous stamps
- Snap to Pixels: Should this Brush use precise coordinates to apply paint or snap to center of pixels
- Tags: Built-in Brush tags, visible in Brush Picker
- Previous: You can chain multiple Brushes into one. Currently only Nested Document Node exposes Brushe’s Graph when you plug a Brush from blackboard to “Document” Input.
Precise paint engine
PixiEditor now uses precise paint engine. Previously all brush stamps were rounded to pixels, starting from version 2.1, you can paint with sub-pixel precision. Snapped pixels are still an option per-brush.
Stabilizers
![]()
We’ve added 2 stabilizers: Distance based and Time based. They are available within pen tool settings in the viewport.
Time based: Stabilization is calculated based on time passed between previous position and new position.
Distance based: You need to move X pixels before brush follows your pointer. It’s like dragging something with a rope, you need to move far enough for the rope to become tight, before it draggs the thing on the other side.
Smart Layers
PixiEditor now support smart layers. You can use other .pixi files within your document, embed .svg files directly as layers and more.
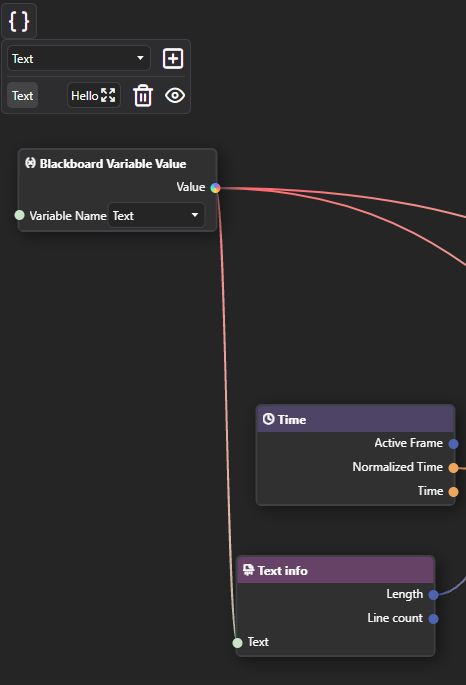
PixiEditor’s advanced Node Graph allows to expose values to parent document, if they are embedded as a nested document (smart layer). Additionally, with new Blackboard feature, you can define inputs to your smart layers.
So for example you can create a nice text animation template and create “Text” blackboard input.
Then after embedding this animation within other file, you can type your text and it will be passed to the nested document.
This way you can reuse one file multiple times and compose your graphics/animations much more easily.
Blackboard
Blackboard is our solution for multiple, important things:
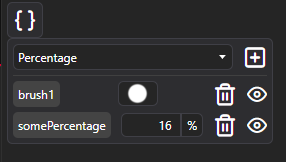
- It serves as a way to define and reuse constants within one Node Graph
- It defines Brush settings, that are exposed in Pen tool settings when brush is picked
- It allows for defining inputs for graphs. Inputs are a gateway to pass data between parent document and embedded one. If you prefer programming comparision, you can think of a nested graph as a function and inputs as function parameters.
New Renderer
As a response to a few important issues, I’ve decided to rewrite a lot of core rendering components. There are plenty of new optimizations and characteristics. A few issues, that the new renderer is trying to solve:
- Bad/inaccurate previews
- Bad performance when running some animations
- Better responsiveness of the app
The core idea behind new renderer is to decouple UI controls from actual graph rendering. I am aiming to make it truly asynchronous on a separate thread, but it’s a very challenging problem, so at the moment, rendering is pseudoasynchronous. It means, that rendering is still running on the main thread, but it’s scheduled on background priority when possible.
Please report any issues rendering.
New Nodes
- Gradient Node: Create gradients procedurally
- Pattern Node: Draw vector stroke out of input image.
- Viewport Info: Information about active viewport
- Blackboard Variable Value: Access blackboard variables
- Stroke Info: Info about current Brush stroke, only works within Brushes
- Brush Output: A node for defining brushes, see Brush Engine section
- Pixel Perfect Ellipse: New shape, that creates pixel-perfect ellipses
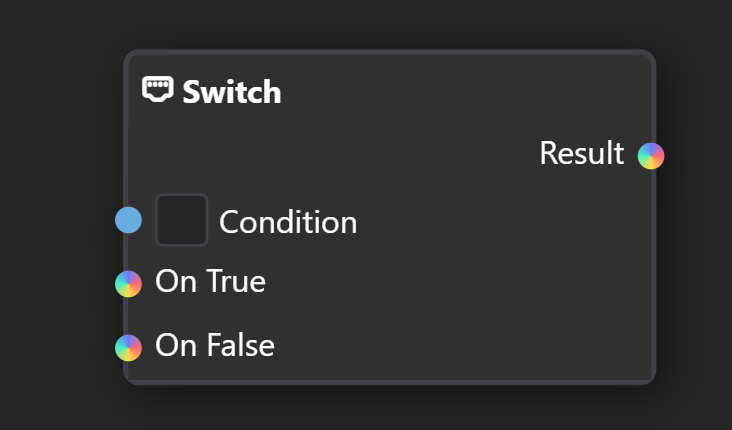
- Switch: Choose a value based on a condition
- Equals: Are two items equal
- Expose Value: Exposes arbitrary value from the graph as a output, when nested into other document.
- Editor Info: Info about current editor state, currently only Primary and Secondary color
- Nested Document: Smart Layer node. Allows for picking any document file.
- Pointer Info: Info about current pointer, such as pressure, position on canvas and more.
- Keyboard Info: Information about keyboard state, currently bools about modifier keys.
New Sockets
You may notice new colorful inputs in the graph, they mean that any type can be plugged into them.
Customizable Toolsets and Brush Tools
You can now create your own toolsets and tools based on Brushes.
Go to %localappdata/PixiEditor/Configs and create a file called ToolSetsConfig.json. Now, the contents of the file may look like this:
{
  "CustomTools": [
    {
      "ToolName": "Gradient",
      "Brush": "path/to/brush/GradientBrush.pixi",
      "Icon": "path/to/icon.png",
      "ToolTip": "Allows for drawing gradients",
      "DefaultShortcut": "G",
      "ActionDisplays": [
        {
          "ActionDisplay": "Click and drag to create a gradient"
        },
        {
          "Modifiers": "Ctrl",
          "ActionDisplay": "Click and drag to create an inverted gradient."
        }
      ]
    }
  ],
  "ToolSets": [
    {
      "Name": "Toolset",
      "Icon": "icon-noise",
      "Tools": [
        "Gradient"
      ]
    },
    {
      "Name": "PAINT_TOOLSET",
      "Icon": "icon-paint-brush",
      "Tools": [
        {
          "ToolName": "MoveViewport",
          "Icon": "path/to/new/icon.png"
        }
      ]
    }
  ]
}
For icons, you can use .png, .svg or icon-name to use PixiEditor’s built-in icons. All glyphs can be found here.
You can overwrite built-in toolsets settings and icons. It is not possible to remove any existing items.
Other enchancements
- Importing images now embed them as smart layers by default. To edit them, you need to rasterize them.
- Improved string editor. Now it supports syntax highlighting for shaders, search and replace and more.
- Improved stability of OpenGL render api
- Clipboard now should work much better and more stable. Linux bros, please test!
Known Issues
- Performance on OpenGL (Windows, MacOS) is noticeably worse than Vulkan on Windows.
- Performance on Vulkan for Linux is worse than OpenGL for Linux.
Some Brushes suffer from this greatly, I’m working on improving it, but for now, make sure to use Render api which works better on your machine (sorry MacOS!)
- Equals node does not support contextful inputs yet.
For feedback, check out Brush Engine Mega Thread and our Discord Server